Lab topology:
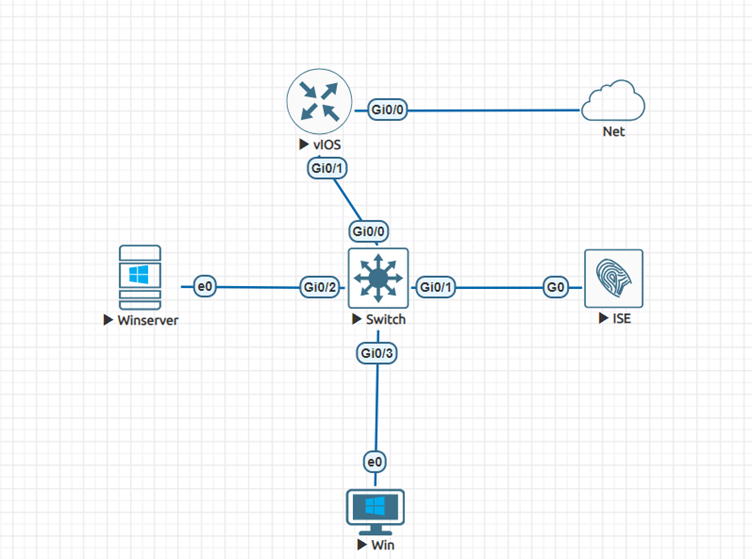
Here, Winserver is my AD server and vIOS is my default gateway.
PART 1:
Joining Cisco ISE with Active Directory or Configuring AD in Cisco ISE.
Step 1:
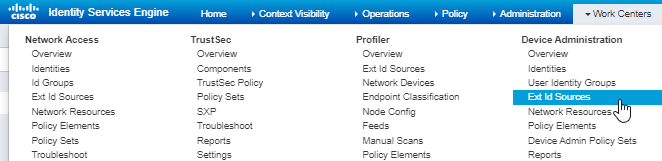
Go into Work Centers>Device Administration>Ext Id Sources.
Click on Ext Id Sources.
Step 2: Click on Active Directory> Add
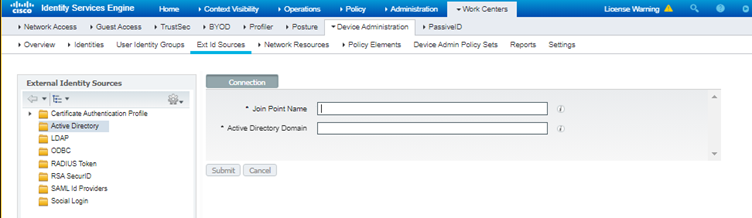
After clicking you will be required to give the Join Point Name you can name it anything you want.
In Active Directory Domain, give the domain name of your AD.
Note:- Make sure the DNS server that you have configured for ISE is able to resolve the domain name of your AD server otherwise it won’t be able to join AD.
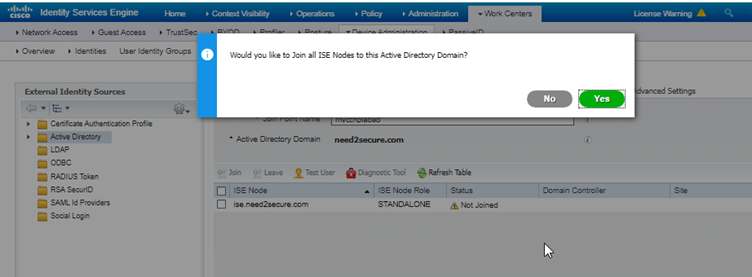
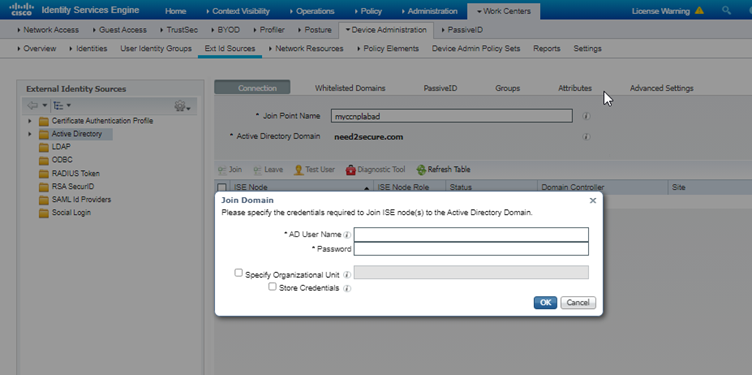
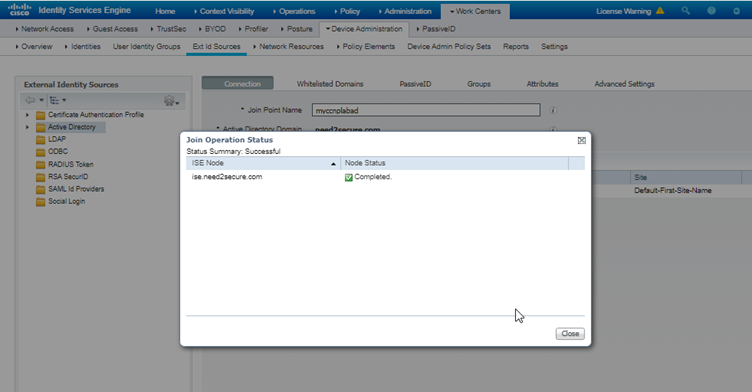
Step 3: Click on Yes to join the Active Directory Domain and insert the admin account of your AD.
Step 4: Retrieve the user groups from the AD that you want to use for Device Administration
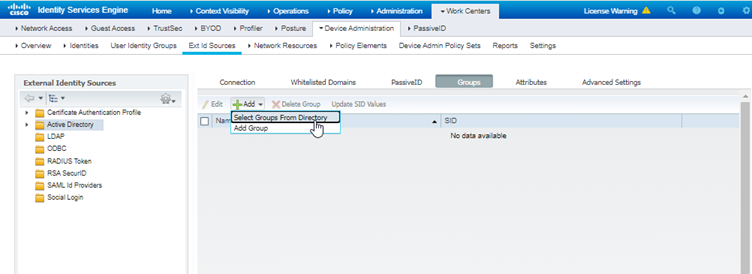
Click on Select groups from directory and then retrieve groups to retrieve all the groups that are present in the AD.
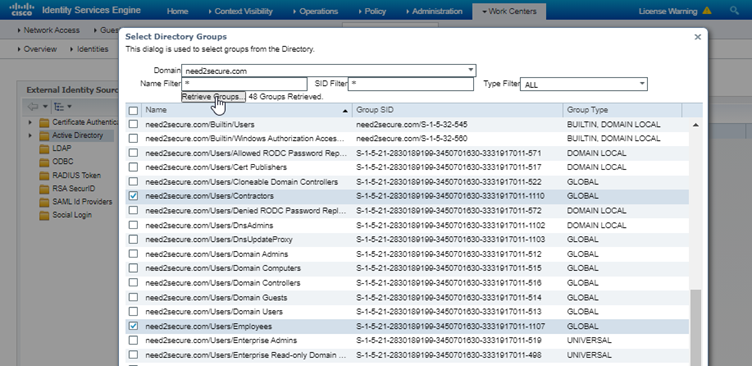
Here I have created 2 groups in AD 1. Employees and 2. Contractors
Employees will have full admin access rights to the networking devices and Contractors will have read only access to the networking devices.
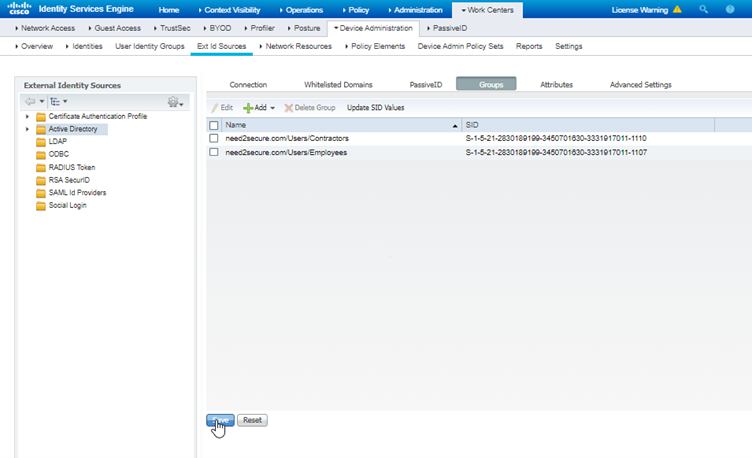
Here, the first step of adding the AD to Cisco ISE is completed.
PART 2:
Configuring Device Administration on Cisco ISE.
Step 1:
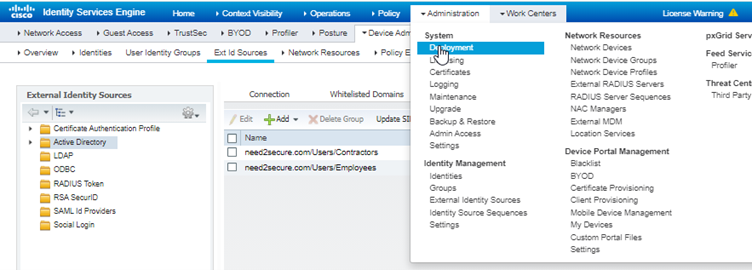
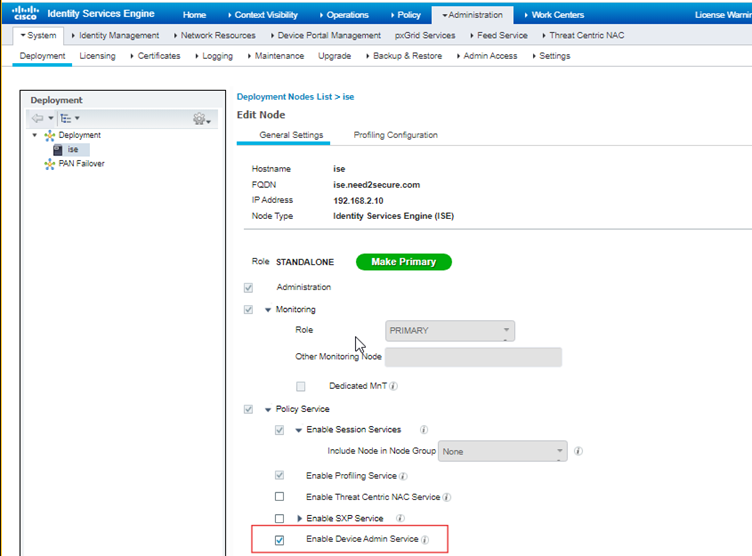
Enable Device Admin Services on Cisco ISE.
Go to Administration>System>Deployment>Ise(If it is in standalone)>Enable Device Admin Service
This will enable the Device Admin Service on Cisco ISE.
Alternatively you can enable Device Admin Service by going to
Work Centers>Device Administration>Deployment
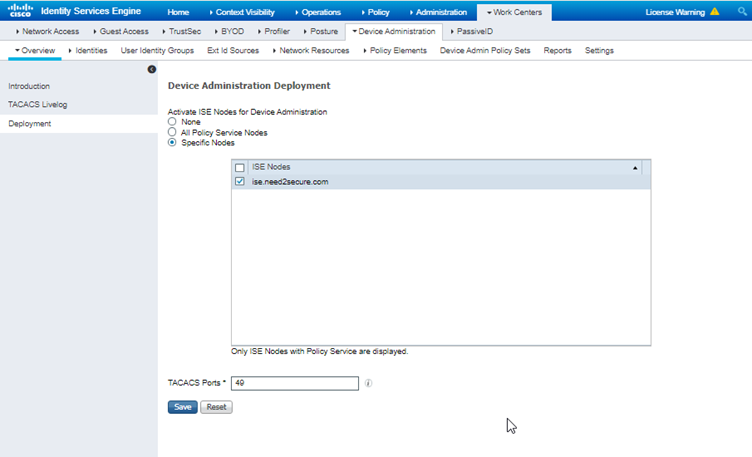
You can click on All policy service nodes or you can select nodes by specifying the nodes.
Step 2:
Adding Network Devices on Cisco ISE
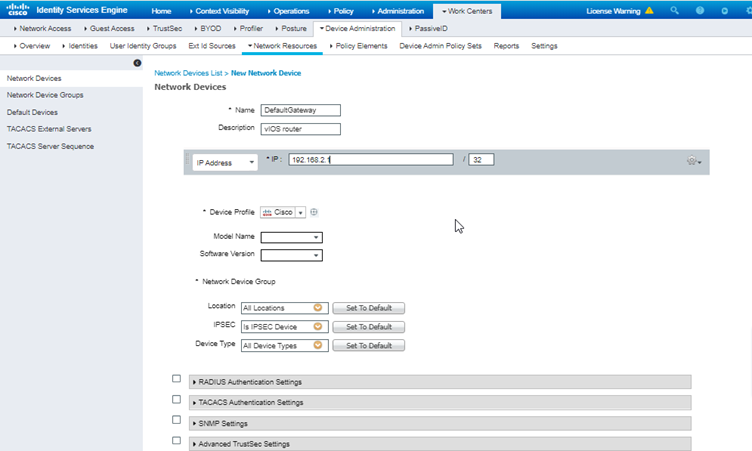
Go to Work Centers>Device Administration>Network Resources>Network Devices>Add
Fill in the required details of your target network device that you want to add and tick on TACACS Authentication settings
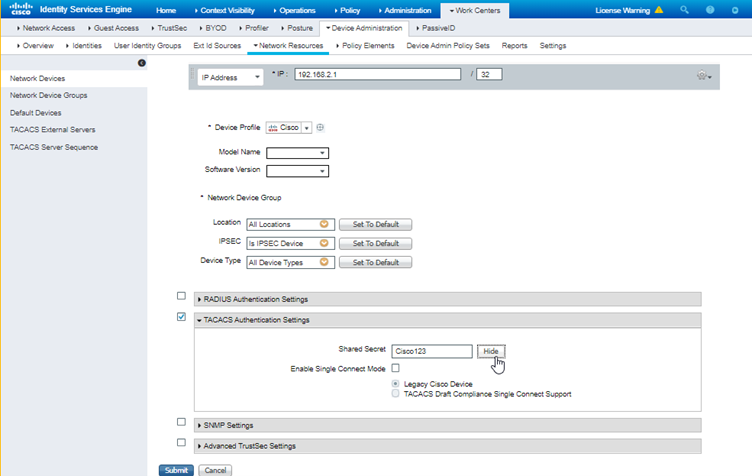
Remember the Shared Secret key as it would be used to add on the router while configuring AAA.
Click Submit.
Step 3:
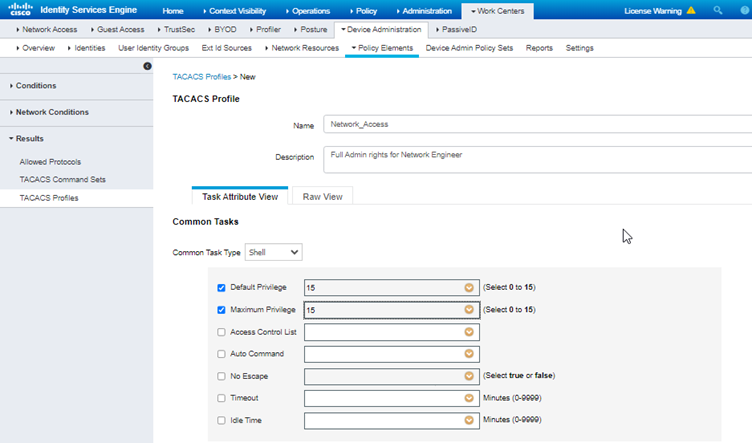
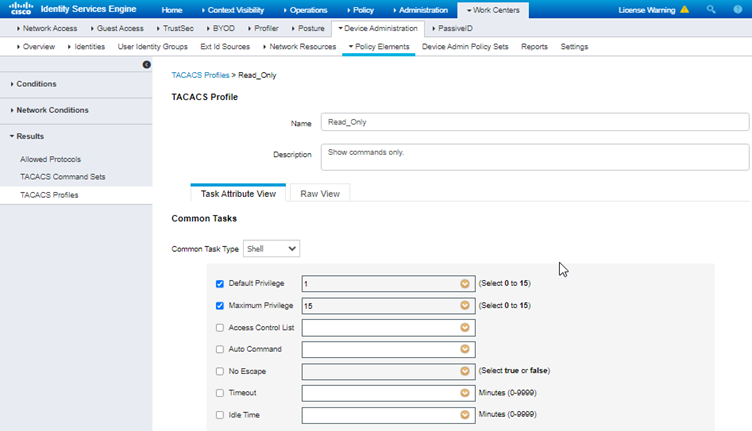
Create TACACS Profile for assigning privilege levels to the Users.
Navigate to Work Centers>Device Administration>Policy Elements>Results>TACACS Profiles>ADD
Add the default and maximum privilege level that you want for the users and click submit.
As it is the full access I will keep it as 15 so the user will directly start with privilege exec mode(#)
For Read only users I will keep default privilege level to 1 and Maximum privilege levels to 15 so that they will start with User exec mode (>) and then go to privilege exec mode (#) after entering the enable password but they will be limited to only show commands.
Step 4:
Create TACACS Command Set.
Go to Work Centers>Device Administration>Policy Elements>Results>TACACS Command Sets>ADD

Just click on “Permit any command that is not listed below” and then submit.
This will allow all the commands for the administrator.
Now let’s see how to limit the access to only show commands
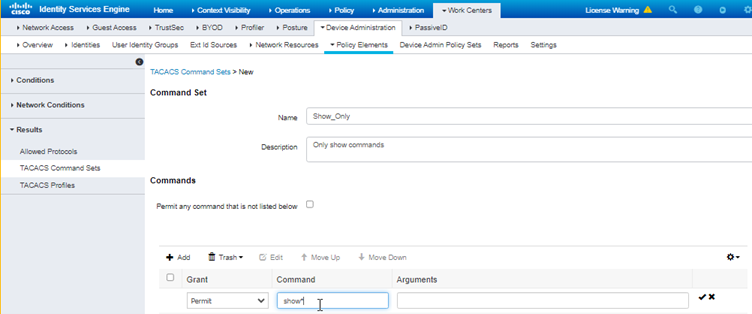
The * sign after show indicates that the user can use all of the show command,
If you want to limit the show command to only particular arguments then add the keyword in Arguments section.
for eg: show ip route, show ip interface brief, show running-configuration etc.
Step 5:
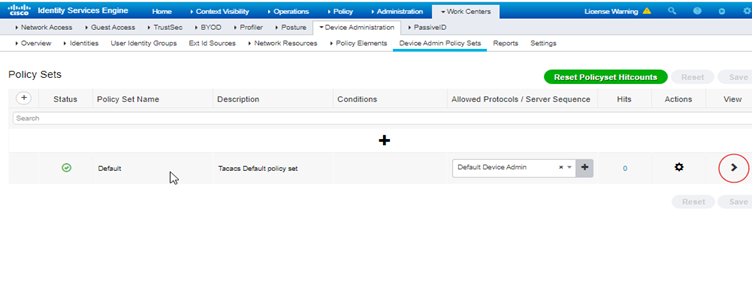
After creating TACACS profile and command set, it is now time to create a Device Admin Policy Set by merging the TACACS profile and command set.
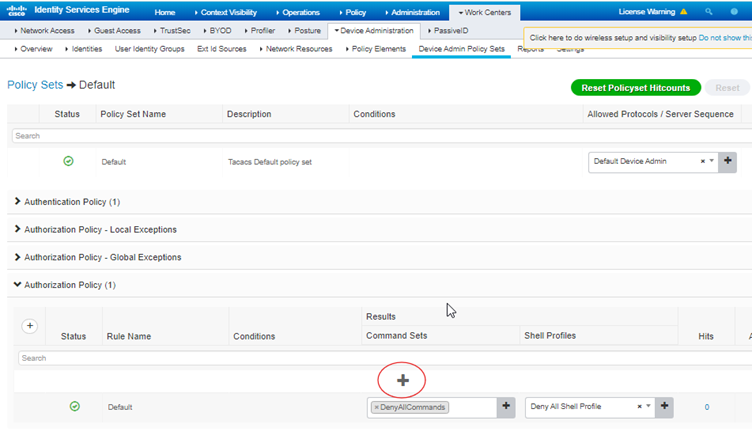
Navigate to Work Centers>Device Administration>Device Admin Policy Sets
Here I am keeping the Default policy set.
Now click on the View(>) Sign on the far right.
Keep the Authentication policy as it is, unless you want to strictly use your AD for authentication source, then drop down the use and select the AD join name that we created.
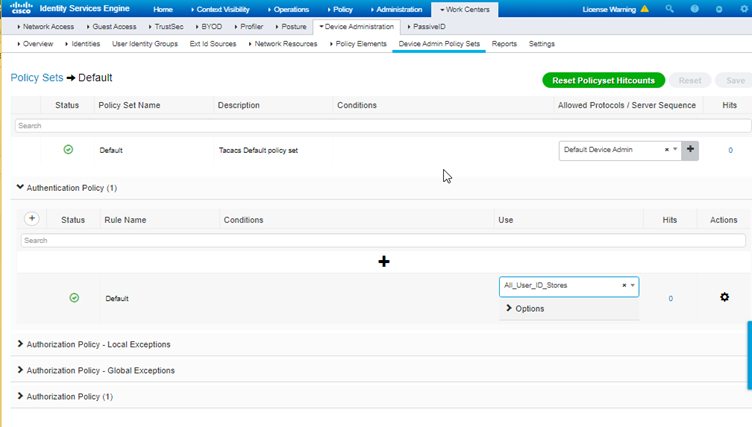
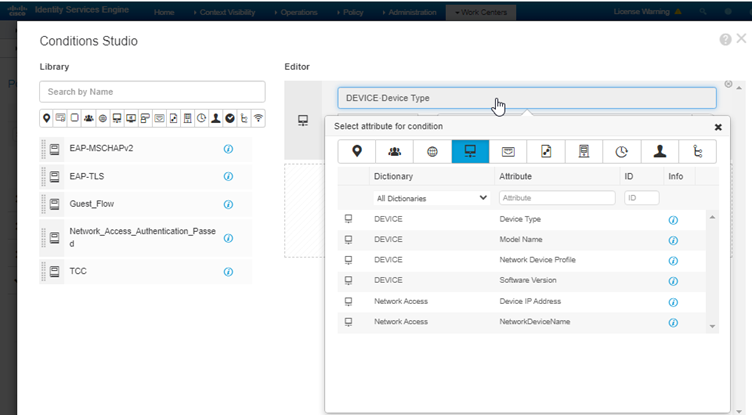
Now go in the Authorization policy here we will merge the TACACS Profile and Command sets.
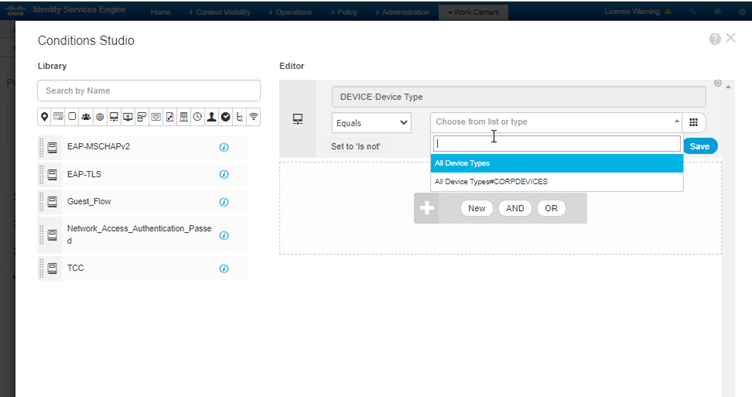
Now add the conditions, Select Device Type and select All Device Types unless you have created network device group.
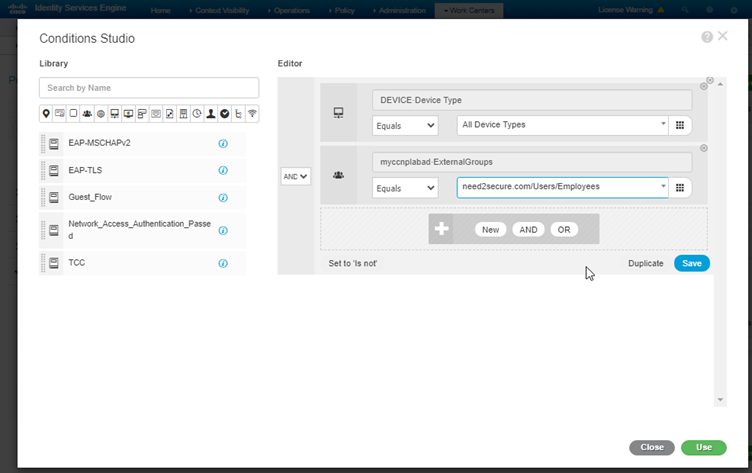
Then add your external ID AD group.
Then add and select the TACACS profile and command set that you want to use and click save, here I am using the full access.

Here our Device Admin configuration is done on the ISE
PART 4:
Cisco IOS AAA Configuration:
On Cisco IOS We have to create the AAA Server group and add the Authentication, Authorization and Accounting Commands.
Step 1:
Adding the ISE server and creating AAA server group
EDGEROUTER(config)#aaa new-model // To enable AAA services
EDGEROUTER(config)#tacacs server ise // create a server named ise, you can give any name
EDGEROUTER(config-server-tacacs)#address ipv4 192.168.2.10 // your ISE server address
EDGEROUTER(config-server-tacacs)#key Cisco123 // Shared Key that you added in Cisco ISE Network Devices
EDGEROUTER(config-server-tacacs)#exit
EDGEROUTER(config)#aaa group server tacacs+ isegroup // create a tacacs+ group, you can give any name
EDGEROUTER(config-sg-tacacs+)#server name ise //add the ise server that we created above.
Step 2:
After adding the ISE server and group, now its time to configure Authentication, Authorization and Accounting on IOS.
Note: “//” Stands for comments do not use it in actual command.
Authentication:
Here I am using default method which applies to line vty instead of manually adding the authentication method in line vty
EDGEROUTER(config)#aaa authentication login default group tacacs+ local // uses tacacs+ group that we created and if it fails then it goes for local credentials
EDGEROUTER(config)#aaa authentication enable default group tacacs+ enable //Authentication for enable password
Authorization:
EDGEROUTER(config)#aaa authorization exec default group tacacs+ local //used for privilege level authorization
EDGEROUTER(config)#aaa authorization config-commands //used for configuration commands authorization
EDGEROUTER(config)#aaa authorization commands 1 default group tacacs+ local //used for privilege level command authorization, which privilege level has access to what commands.
EDGEROUTER(config)#aaa authorization commands 15 default group tacacs+ local
Accounting:
EDGEROUTER(config)#aaa accounting exec default start-stop group tacacs+ //accounting for privilege level
EDGEROUTER(config)#aaa accounting commands 15 default start-stop group tacacs+ //accounting for commands
EDGEROUTER(config)#aaa accounting commands 1 default start-stop group tacacs+
Part 5:
Verification
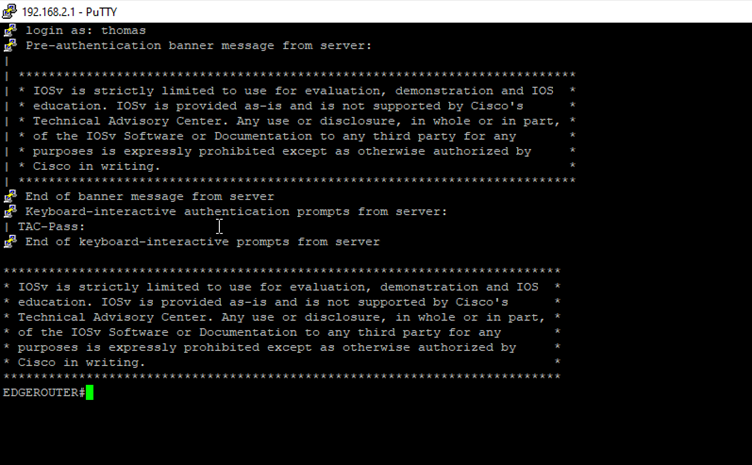
After entering the correct credentials I got the access of the router.
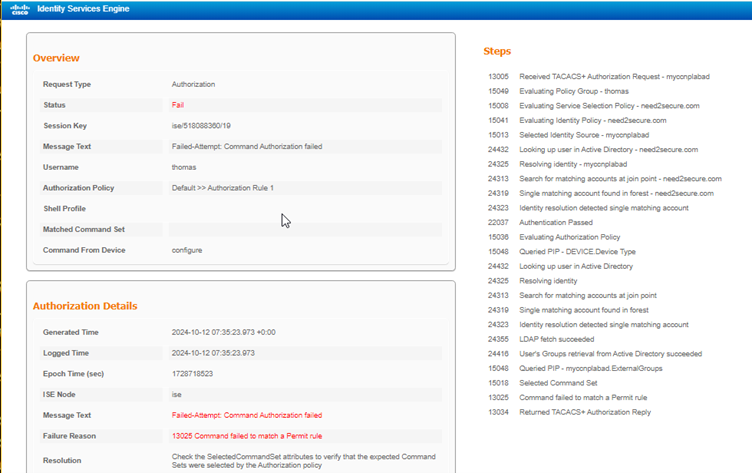
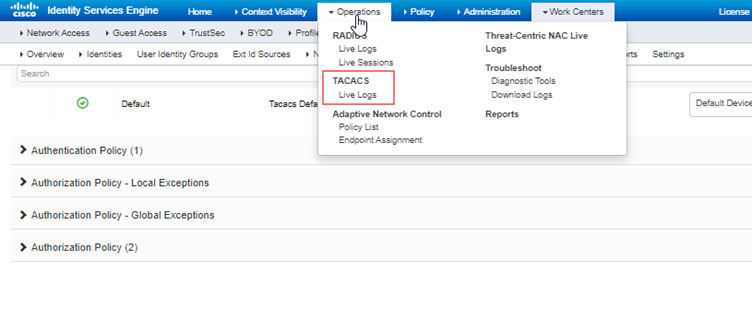
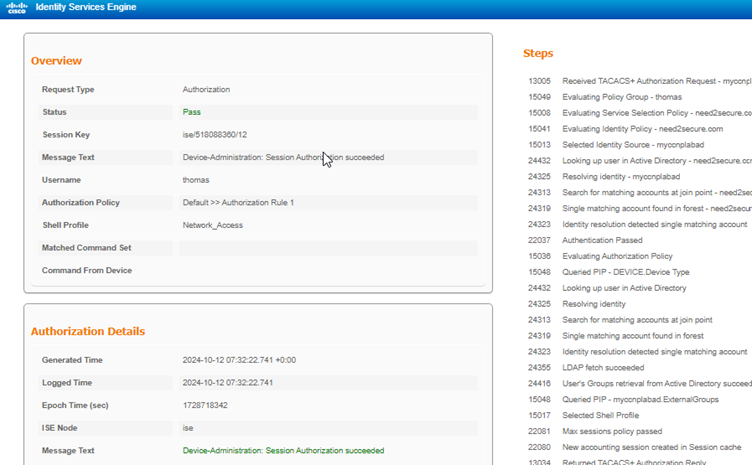
To check for logs on ISE Operations>TACACS Live Logs
For users with read only access:
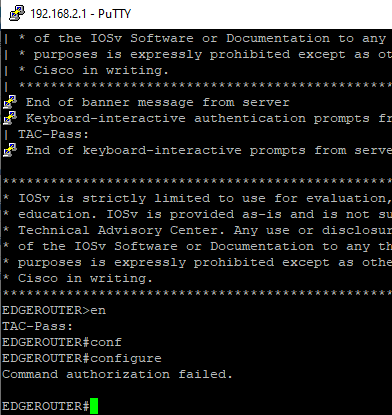
Command authorization failed as I have not allowed this command in the command sets for read only users.